Did you know that 90% of mushrooms sold in global supermarkets are a single species (Agaricus bisporus), yet they are arguably the most difficult type for a hobbyist to grow at home? It is a classic irony of the fungal world: the mushroom we are most familiar with—the common Button—requires a complex, fermented compost and a precision-controlled environment that would frustrate even a seasoned gardener. Meanwhile, the exotic-looking Oyster mushroom can practically grow on a roll of wet toilet paper or a handful of discarded coffee grounds.
The challenge for most beginners is “The Supermarket Bias.” We naturally want to grow what we eat most often, leading many to fail by attempting Button mushrooms as their first project. This “pain point” of high-maintenance substrates and contamination often kills the hobby before it starts. The ultimate solution is choosing the right “starting species” based on your available equipment and patience. This article provides a comprehensive comparison between Button and Oyster mushrooms, exploring the growth mechanics of each and providing a clear roadmap to help you harvest your first flush with confidence.
Understanding Button and Oyster Mushrooms: Key Concepts and Importance
To understand the difference between these two, we must look at their natural ecological roles. Button mushrooms (Agaricus bisporus) are “secondary decomposers.” They don’t eat fresh organic matter; they wait for bacteria and other fungi to break things down into a complex, ammonia-free compost first. Oyster mushrooms (Pleurotus ostreatus), however, are “primary decomposers.” They are the aggressive pioneers of the woods, landing on a freshly fallen log and immediately tearing through the tough wood fibers.
Think of the Oyster mushroom like a hungry wolf—it is fast, aggressive, and can eat almost anything from straw to cardboard. The Button mushroom is more like a gourmet food critic—it is incredibly picky about its diet and will refuse to grow if the “kitchen” (your substrate) isn’t prepared to an exacting professional standard.
Historically, Button mushroom farming was an industrial secret because creating “Phase II” compost requires massive machinery and heat-pasteurization. Conversely, Oyster mushrooms have become the face of the urban farming revolution because they are so “low-tech” friendly. Understanding this biological distinction is crucial. When you grow Oysters, you are working with an organism that wants to live. When you grow Buttons, you are working with an organism that is looking for a reason to quit.
Why It Matters: The Top Benefits of Choosing the Right Species
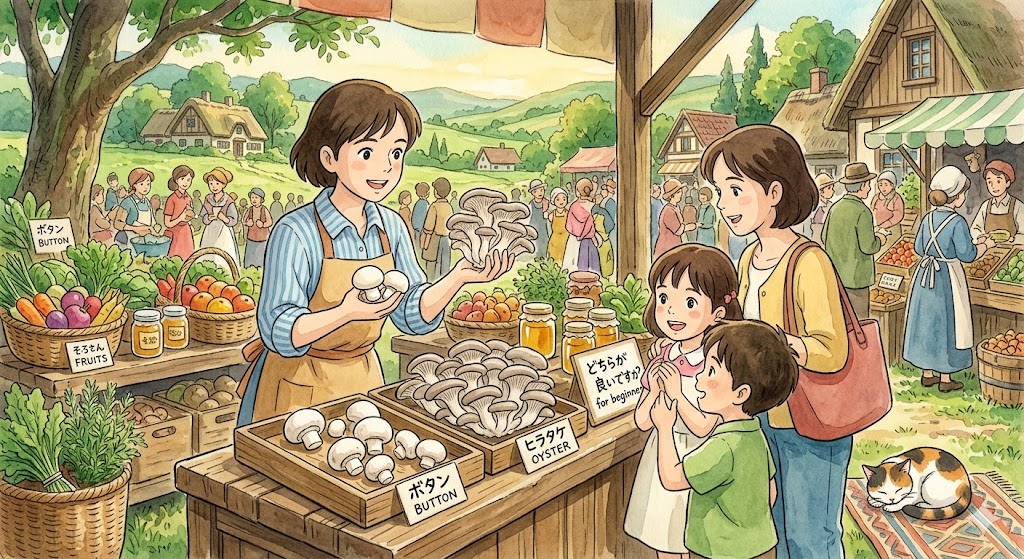
Matching your skill level to the right species determines whether your indoor farm becomes a source of food or a source of stress.
- Success Rate & Motivation: Oyster mushrooms have a “biological efficiency” that can reach 100%. For every kilogram of dry straw you provide, you can expect nearly a kilogram of fresh mushrooms. This high success rate is vital for keeping beginners motivated.
- Speed of Harvest: Oysters are the “fast food” of fungi. You can go from inoculation to harvest in as little as 21 days. Button mushrooms require a long “casing” period and a complex composting phase that can take 8–10 weeks.
- Economic Value: While Button mushrooms are cheap to buy at the shop, gourmet Oysters (Pink, Blue, or Gold varieties) can fetch high prices at farmers’ markets. Growing Oysters at home offers a much higher financial return for your effort.
- Environmental Versatility: Oysters thrive in a wider range of temperatures and can be grown in “grow bags” hung from the ceiling, saving valuable floor space in small apartments.
Pro Fact: Oyster mushrooms are actually carnivorous. They possess microscopic “lassos” that they use to trap and consume tiny soil worms (nematodes) for extra nitrogen. This aggressive nature is exactly why they are so easy for beginners to grow!
How to Get Started: A Practical Guide for Beginners
If you are a total novice, I recommend starting with Oyster mushrooms, but here is how to navigate the path for either species.
Step 1: Choose Your Substrate
For Oysters, source clean cereal straw, shredded cardboard, or used coffee grounds. For Buttons, do not try to make your own compost. Buy a “pre-spawned” tray or bag where the complex fermentation has already been done by professionals.
Step 2: Pasteurization
Oysters only need “Pasteurization” (soaking straw in 70°C water for 2 hours). This kills the bad bugs but leaves the good ones. Button mushroom compost must be perfectly balanced; otherwise, the nitrogen-rich environment will invite green mold (Trichoderma) instead of mushrooms.
Step 3: Inoculation
Mix your “Spawn” (mushroom seeds) into your substrate. For Oysters, you can do this in any clean room. For Buttons, you must be extremely careful not to introduce outside bacteria, as their compost is a magnet for contamination.
Step 4: Incubation
Keep your bags in a dark, warm spot (20°C–24°C). You will see white “mycelium” begin to cover the substrate like frost. This phase is much faster for Oysters than for Buttons.
Step 5: Fruiting and Fresh Air
Once fully white, Oysters need a simple slit in the bag and lots of Fresh Air Exchange (FAE). Buttons require a “Casing Layer”—a specific mix of peat moss and lime applied to the top—to trigger the mushrooms to grow.
Beginner’s Tip: If you want to try Button mushrooms, start with a pre-made kit. It skips the 4-week composting nightmare and lets you focus on the “fruiting” stage. Once you’ve mastered a kit, you’ll understand why the pros use specialized equipment!
Overcoming Challenges and Looking into the Future
The biggest challenge with Oyster mushrooms is their spore load. They release millions of spores that can cause allergies if grown in a living room without ventilation. The solution is to harvest them early, before the caps curl upward. For Button mushrooms, the hurdle is pest management. Fungus gnats love the damp compost of a Button tray. Using “Yellow Sticky Traps” and keeping the area sealed is essential.
Looking ahead, the future of home cultivation is moving toward “Upcycled Mycology.” We are seeing researchers develop Oyster strains that can eat plastic waste or cigarette butts (though you wouldn’t eat those!). As our understanding of fungal genetics improves, we are also seeing “low-spore” Oyster varieties being bred specifically for apartment dwellers, making the hobby safer and more accessible than ever.
Conclusion
When it comes to the battle of the beginners, the Oyster mushroom is the clear winner. Its aggressive growth, tolerance for various substrates, and rapid harvest time make it the perfect entry point into the world of mycology. While the Button mushroom is a kitchen staple, its agricultural demands are often too steep for a home setup without industrial-grade composting tools.
Your Task: Order a “Grey Oyster” spawn bag or a “Pink Oyster” kit today. It is the most reliable way to witness the “magic” of fungal growth without the heartbreak of contamination.
The forest is waiting to grow in your home; start with the species that actually wants to help you succeed!
Frequently Asked Questions (FAQs)
1. Can I grow Button mushrooms on straw like Oysters? No. Button mushrooms lack the enzymes to break down raw straw efficiently. They require the straw to be “pre-digested” through a thermophilic composting process that turns it into a dark, earthy substance.
2. Which one tastes better? This is subjective, but Oyster mushrooms have a much more complex, “umami” flavor and a meaty texture. Button mushrooms have a milder, earthy taste that most people find familiar and versatile for daily cooking.
3. Do I need a dark room for Oysters? Only during the “Incubation” phase (when the mycelium is growing). When it is time to grow the actual mushrooms, they need a small amount of light to know which direction to grow. A kitchen with a window is perfect.
4. Why did my Button mushrooms turn brown and stop growing? This is often called “Aborting.” It happens if the humidity drops too low or if the temperature fluctuates wildly. Mushrooms are 90% water, so even a few hours of dry air can kill the delicate “pins” before they mature.