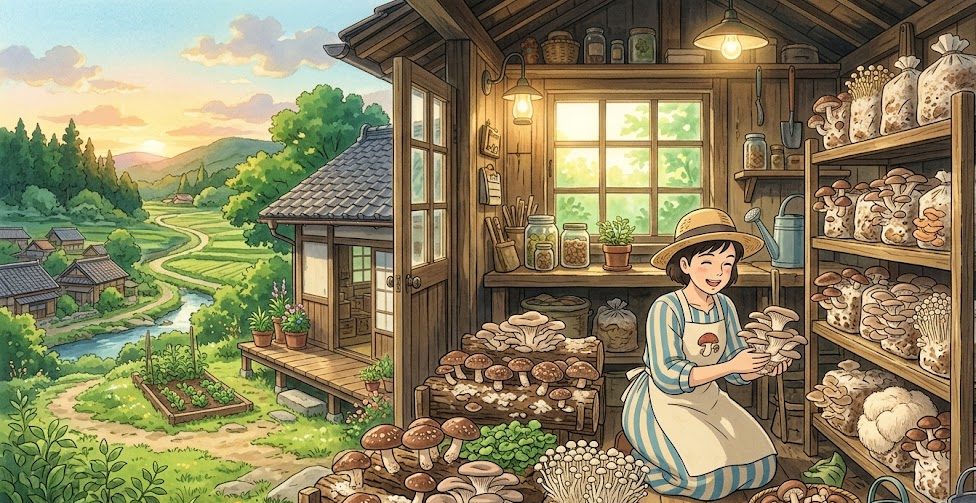
When most people think of profitable home business ideas, they immediately picture tech startups, freelance writing, or e-commerce stores. Rarely does anyone consider the quiet, dark, and incredibly lucrative world of fungi. Yet, small-scale mushroom cultivation is quietly becoming one of the most profitable home-based agricultural businesses in the world.
Unlike traditional agriculture, which requires acres of expensive land, heavy tractors, and favorable seasonal weather, mushroom farming flips the rules upside down. Mushrooms grow vertically, meaning you can stack your crops and generate massive yields from a tiny footprint. A spare closet, an empty garage, a basement, or even a simple DIY grow tent in a spare bedroom can easily become a high-yield production facility.
Furthermore, mushrooms are incredibly fast growers. While a traditional crop like corn or tomatoes can take months to mature, certain gourmet mushroom varieties can go from a spores-in-a-bag setup to a beautiful, harvestable cluster of fresh food in just a few short weeks.
If you are looking for a creative, sustainable, and highly profitable business that you can start with low upfront costs, mushroom farming is an absolute goldmine. This comprehensive, step-by-step guide will walk you through everything you need to know to launch your home-based mushroom farm from scratch and turn it into a thriving revenue engine.
Phase 1: Choosing Your Specialty Mushroom Niche
Before you buy any equipment, you need to understand that you cannot compete with massive industrial farms on cheap, mass-produced varieties. Large corporate agricultural facilities grow white button, cremini, and portobello mushrooms by the ton, keeping retail prices incredibly low.
To succeed as a home-based grower, you must focus entirely on gourmet and medicinal mushrooms. These exotic varieties are highly prized by chefs, organic grocery stores, and health-conscious consumers, and they cannot be easily harvested by heavy machinery. They require careful, hands-on attention, which keeps their market value high and protects you from corporate price undercutting.
Here are the most profitable, beginner-friendly varieties to focus on:
1. Oyster Mushrooms (The Ultimate Beginner Choice)
Oyster mushrooms are the undisputed king for beginner home growers. They possess an incredibly aggressive mycelium, which means they grow rapidly, fight off contamination easily, and can survive on a wide range of simple growing materials. They come in stunning varieties, including:
- Blue Oyster: Thrives in cooler temperatures and produces thick, beautiful, heavy clusters.
- Pink and Yellow Oyster: Beautiful, vibrant mushrooms that love warm weather and have a unique, delicate shelf-life that commands premium prices.
- King Oyster: Highly sought after by gourmet chefs for its thick, meaty, savory stem, often used as a vegan scallop alternative.
2. Lion’s Mane
Lion’s Mane is exploding in popularity worldwide. Visually, it looks like a beautiful, shaggy white pom-pom rather than a traditional cap-and-stem mushroom. In the culinary world, it is celebrated for having a texture and flavor remarkably similar to lobster or crab meat. In the health and wellness space, it is highly sought after for its proven cognitive and neurological health benefits.
3. Shiitake
Shiitake mushrooms are a classic staple in fine dining, Asian cuisine, and organic markets. They have a deep, earthy, smoky flavor profile. While they take a bit longer to mature than Oyster mushrooms, their steady market demand and high retail price per pound make them a highly reliable long-term crop.
Phase 2: Setting Up Your Home Fruiting Chamber
You do not need a commercial greenhouse to grow high-quality mushrooms. Your main goal is to create a small, controlled microclimate where you can manipulate four core environmental factors: humidity, fresh air, temperature, and light.
For a beginner starting from home, the most efficient and cost-effective setup is a Martha Tent or a simple DIY Grow Tent assembly.
   =========================================
  |   [ Inline Exhaust Fan ] (Pulls air out)|
  |                                         |
  |    --- Shelves for Growing Bags ---     |
  |   [ Bag 1 ]     [ Bag 2 ]     [ Bag 3 ] |
  |   [ Bag 4 ]     [ Bag 5 ]     [ Bag 6 ] |
  |                                         |
  |   [ Cool Mist Humidifier ] (Pumps fog)  |
   =========================================
1. Humidity Control
Mushrooms are made of roughly 90% water. If your growing environment is dry, your mushroom caps will split, crack, and stop growing completely. You need to keep the relative humidity inside your tent between 85% and 95%. Invest in a simple cool-mist ultrasonic humidifier connected to a digital humidity controller (hygrometer) that automatically turns the machine on and off to maintain the perfect environment.
2. Fresh Air Exchange (FAE)
This is where many beginner growers make a fatal mistake. As mushrooms grow, they actively breathe in oxygen and breathe out Carbon Dioxide (CO2). If your grow tent is completely sealed, CO2 will pool at the bottom, causing your mushrooms to grow long, skinny, stringy stems with tiny, useless caps.
To prevent this, install a small inline duct fan to continuously exhaust the stale air out of the tent, pulling fresh, oxygen-rich air inside. Aim for at least 4 to 6 fresh air exchanges per hour.
3. Lighting and Temperature
Unlike green plants, mushrooms do not need bright sunlight to photosynthesize. However, they do need a little bit of ambient light to trigger the fruiting process and guide the mushrooms to grow in the right direction. A simple, low-power LED light strip set on a 12-hour timer is more than enough. Keep the space at a steady room temperature, ideally between 18°C and 24°C for most standard varieties.
Phase 3: The Step-by-Step Cultivation Process
Mushroom cultivation follows a very specific biological loop. Here is how the step-by-step growing cycle works:
Step 1: Preparing the Substrate
The substrate is the food source your mushrooms eat. For oyster mushrooms, clean agricultural straw or hardwood sawdust pellets are the best options. To ensure that mold or wild bacteria do not eat the food source first, you must pasteurize or sterilize the substrate. For beginners using sawdust pellets, simply mixing them with boiling water in a clean, insulated bucket naturally sterilizes the material while bringing it to the perfect moisture level.
Step 2: Inoculation
Once your substrate has completely cooled down to room temperature, it is time to mix in your grain spawn (grains that are already fully colonized by clean mushroom mycelium). Cleanliness is absolutely critical during this step. Wash your hands thoroughly, wear gloves, and wipe down your workspace with 70% isopropyl alcohol. Mix the grain spawn into the substrate and pack the mixture tightly into clear, breathable plastic grow bags.
Step 3: Incubation (The Colonization Phase)
Place your newly packed bags in a warm, dark closet or room for 2 to 3 weeks. During this time, the invisible white root network of the mushroom (the mycelium) will begin eating its way through the substrate. When the entire bag turns solid, chalky white, the colonization phase is complete.
Step 4: Fruiting and Harvesting
Move the white bag into your humid grow tent. Take a clean knife and slice a small “X” or a horizontal line across the front of the plastic bag. The mycelium will sense the sudden rush of oxygen and humidity at the cut site and begin forming tiny baby mushrooms (called pins). Within 5 to 7 days of pinning, your gourmet mushrooms will rapidly balloon into massive, beautiful clusters ready for harvest!
Phase 4: Marketing and Selling Your Harvest
Growing beautiful mushrooms is only half the battle; you also need to know how to sell them to maximize your profits. Because fresh mushrooms have a limited shelf life (usually 5 to 7 days in a refrigerator), building a reliable, local buyer network before your harvest peaks is essential.
1. Target Local Gourmet Chefs
Boutique, independent, and high-end restaurants are your primary goldmine. Head chefs are constantly on the lookout for hyper-local, pristine ingredients that giant commercial distributors cannot deliver fresh. Put on a clean shirt, pack a few beautiful, complimentary sample boxes of your freshly harvested Oyster or Lion’s Mane mushrooms, and visit local restaurants during their slow afternoon hours (between 2:00 PM and 4:00 PM). Talk directly to the chef, share your weekly production capacity, and secure consistent weekly orders.
2. Leverage Weekend Farmers’ Markets
Farmers’ markets offer a phenomenal way to connect directly with retail consumers who are willing to pay top dollar for organic, artisanal food. A beautifully arranged booth displaying fresh clusters, alongside a small educational sign explaining the culinary and health benefits of varieties like Lion’s Mane, will naturally draw crowds. You can easily charge premium retail prices per pound at these local events.
3. Diversify into Value-Added Products
If you ever have an abundance of unsold fresh mushrooms, do not let them go to waste! Invest in a simple food dehydrator. Dried gourmet mushrooms can be stored safely in airtight jars for over a year. You can grind dried mushrooms into rich, savory “Umami Seasoning Powders,” package them into custom gourmet soup mixes, or create high-margin liquid medicinal extracts and tinctures from your Lion’s Mane crops to sell online.
Mushroom Farming Economics at a Glance
| Factor | Startup/Small Scale | Scaled Home Setup |
|---|---|---|
| Initial Capital Investment | Low ($150 – $300) | Moderate ($500 – $1,500) |
| Space Required | Single closet or spare corner | Full garage or basement layout |
| Time to First Revenue | 4 to 5 Weeks | 4 to 5 Weeks |
| Primary Cost Drivers | Substrate blocks, spawn, packaging | Utility bills (electricity/water), marketing |
Frequently Asked Questions (FAQs)
Q1: Is mushroom farming a safe business to run inside a residential home?
Yes, it is entirely safe, but you must manage airflow correctly. As mushrooms reach full maturity, they release millions of microscopic spores into the air. Breathing in heavy concentrations of mushroom spores over a long period can cause respiratory irritation. To protect your home, always ensure your grow tent uses an active inline exhaust fan paired with a carbon filter or vent the exhaust air directly out of a nearby window.
Q2: What is “contamination” and how do I prevent it?
Contamination happens when wild mold spores, bacteria, or yeasts land on your warm, moist substrate before your mushroom mycelium can colonize it. If you ever see green, black, or pink mold growing inside your incubation bags, the bag has been contaminated. You can prevent this by keeping your workspace pristine, using gloves, wiping surfaces with 70% isopropyl alcohol, and buying high-quality grain spawn from reputable suppliers.
Q3: Can I buy pre-made substrate blocks to save time?
Absolutely! If you don’t want to deal with the mess of mixing straw, sawdust, and boiling water at home, you can buy “Ready-to-Fruit” substrate blocks from large commercial producers. These blocks arrive at your doorstep fully colonized and ready to pop straight into your humid grow tent. While this reduces your profit margin slightly, it saves you hours of labor and allows beginners to start selling fresh mushrooms instantly.
Q4: How many times will a single mushroom bag produce fruit?
A standard mushroom bag will naturally produce 2 to 3 distinct harvests (referred to as flushes) before the nutrients in the substrate are completely exhausted. The first flush will always yield the largest, most spectacular cluster, with subsequent flushes becoming progressively smaller. Once a block is done fruiting, it makes an incredible, nutrient-rich addition to your backyard compost pile.
Conclusion
Starting a home-based mushroom farming business is a deeply rewarding blend of science, art, and entrepreneurship. By bypassing common commodity varieties, focusing on high-value gourmet options like Oyster and Lion’s Mane, and building an optimized, humid indoor growing environment, you can build a highly profitable, sustainable agricultural business without ever leaving your house.
Don’t let a fear of biology hold you back. Start small with a single grow tent or a handful of bags, master the daily rhythms of humidity and fresh air control, build your local network of passionate food lovers, and watch your backyard side-hustle grow into a thriving, bountiful agribusiness!